To learn more about how to install Robomow, take a look at these installation videos:
Step 1: Planning Ahead
Read the Operating Manual/User Guide and watch the Robomow Setup & Operation video before you start the installation. This video will guide you in finding the best locations for the Base Station, Power Box/Power Supply, and Perimeter Wire.
Step 2: Finding the best location for the Base Station
Find the best location for the Base Station according to your plan and specific guidelines.
Step 3: Laying out the Perimeter Wire
Place the Perimeter Wire around the edge, using the RoboRuler to keep the required distances from the lawn edge. The Perimeter Wire will demarcate areas inside the working area that you do not want Robomow to drive inside (like flower beds and ponds). Use the supplied wire pegs to secure the wire to the ground (within a few weeks, the cable will be completely overgrown and invisible).
Step 4: Completing the Perimeter Wire Setup and Installing the Base Station.
Complete the Perimeter Wire setup. Fix the Base Station to the ground in its planned location. Connect it to the Perimeter Wire and to the Power Box/Power Supply.
Step 5: Robomow is ready for Operation
See the image below for more details on this process.
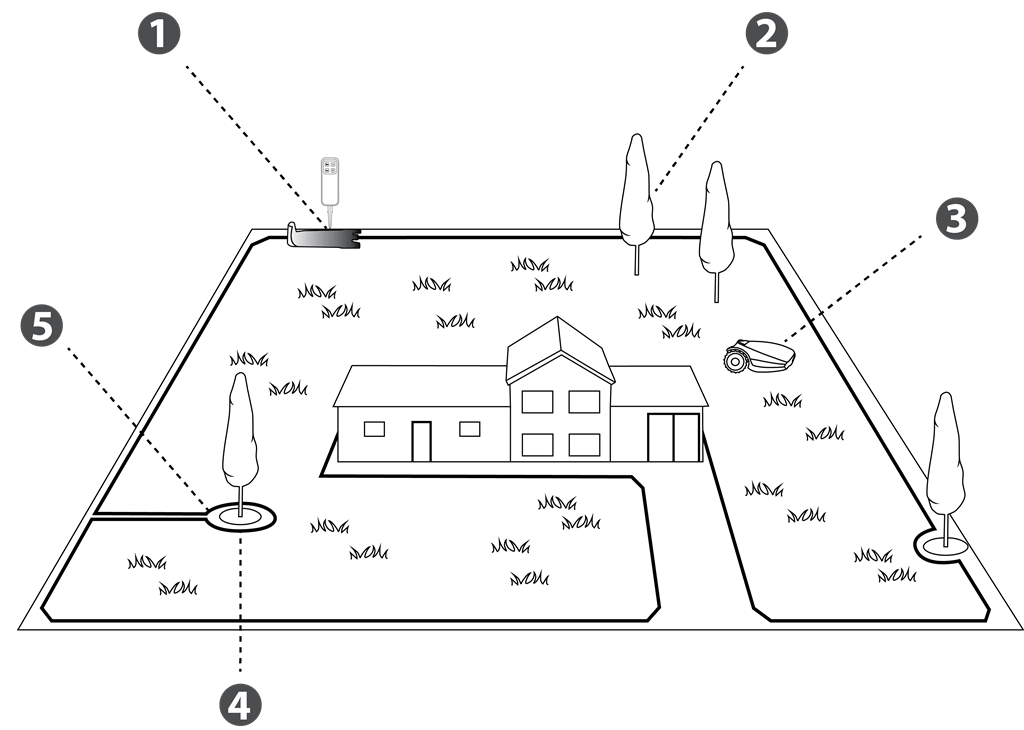
2. Large Trees: Robomow is allowed to bump into them. At this size, the objects do not require a Perimeter Wire around them.
3. Robomow detects the signal and changes direction as it reaches the wire.
4. Tree surrounded by a groove, ditch or flower beds requires a wire around it.
5. Perimeter wire as a virtual wall visible only to Robomow.